Covering terrain with props

Table of contents:
- 1. Covering terrain
- 2. Adding variety
- 3. Randomizing scale and angles
- 4. Related articles & example map
1. Covering terrain
In this tutorial, we'll learn how to use MESS to automatically cover terrain with grass, rocks and other props. Take a look at the following scene:
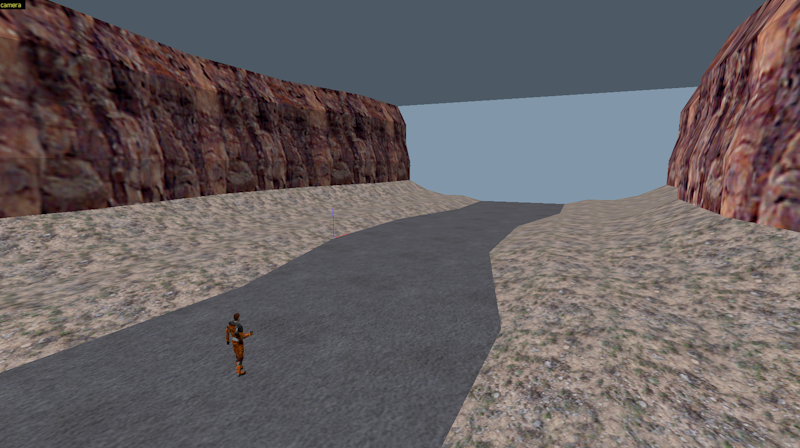
It's pretty empty, right? Let's make it look more interesting by adding some shrubs. First, we'll create a shrub func_illusionary. There are several techniques for this, but we'll start with something simple - we can easily replace it later anyway. We'll be placing this entity outside the playable area - normally that would cause a leak, but it'll be part of a template so we don't need to worry about that.
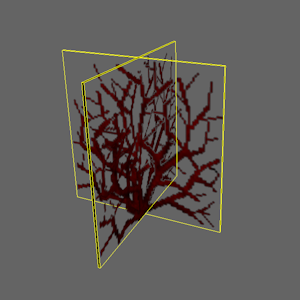
Two thin brushes, covered with the NULL texture on the sides and {SHRUB1B on the front and back, joined into a single func_illusionary with the following properties:
| property name | value |
|---|---|
| Render Mode | Solid |
| FX Amount | 255 |
Next, we'll put a macro_template entity around our shrub:
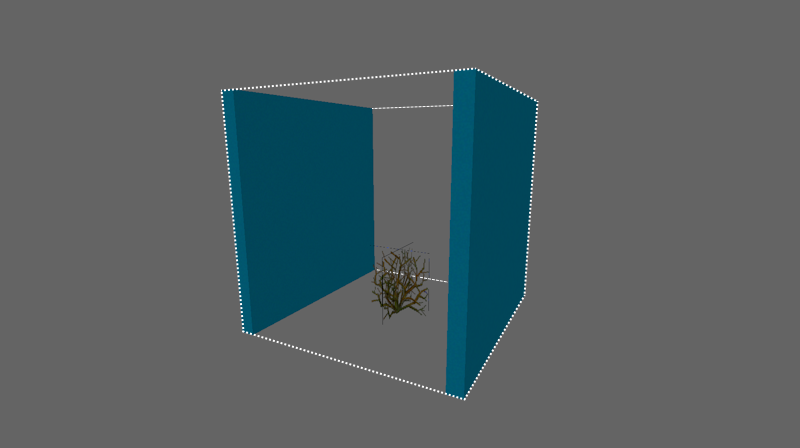
This macro_template consists of two blue brushes. Anything inside the bounding box of a macro_template becomes part of that template, so we could use any shape or number of brushes, but this shape lets us easily select what's inside the template. Set the properties of the macro_template as following:
| property name | value |
|---|---|
| Name | prop_desert |
| Anchor point | Bottom center |
| Selection weight | 1 |
Because we've chosen 'Bottom center' as anchor point, we need to make sure that the bottom of the shrub is at the bottom center of the macro_template's bounding box.
Note that we now have two entities outside the playable area. Normally that would cause a leak, but MESS does not copy macro_template entities and anything that's inside of them to the output map, so we can safely place them anywhere we want.
Now let's go back to our terrain. First, make sure that all unseen faces are covered with the NULL texture - we only want to add shrubs to the top side. Then, select the terrain brushes and turn them into a macro_cover entity:
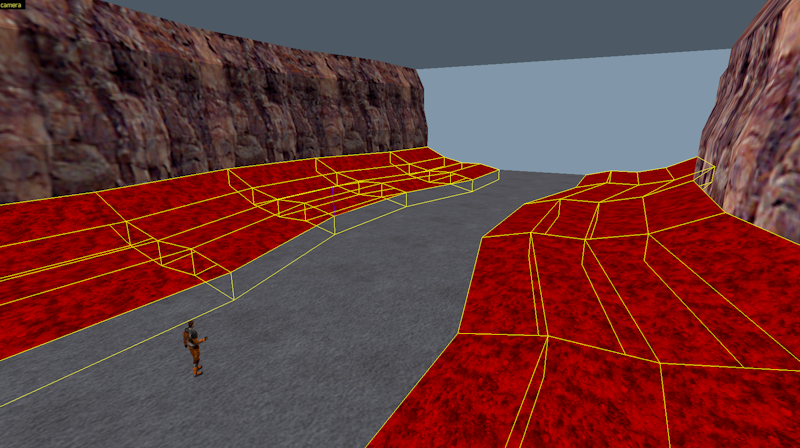
Give the macro_cover the following properties:
| property name | value |
|---|---|
| Template entity | prop_desert |
| Brush behavior | Leave as world geometry |
| Coverage (<1) or max instance count (>=1) | 0.5 |
| Instance radius | 32 |
This tells MESS that it must use our shrub template to cover this patch of terrain. A coverage of 0.5 means that we want to cover roughly 50% of the available surface. MESS then uses the instance radius to calculate how many instances it should try to place. A smaller radius means more instances, but also a higher risk of overlap between them. It's also possible to set a specific number of instances by using values larger than 1.
Either way, let's compile the map and see what we get:
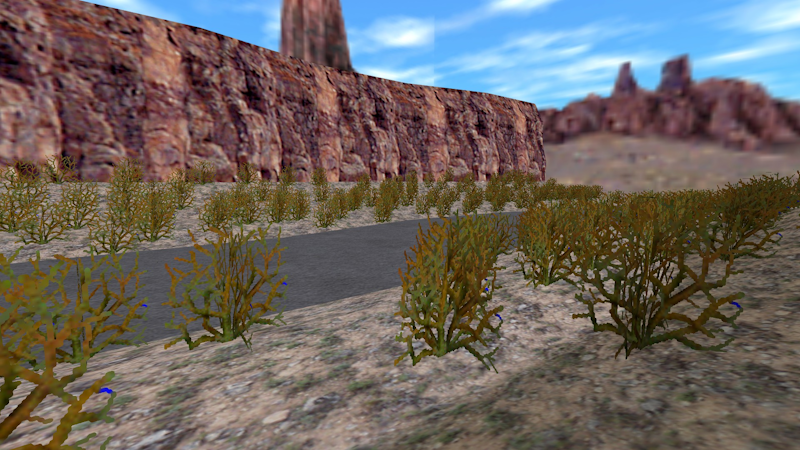
Maybe that's a bit much - Half-Life can only show 256 entities at the same time, and we've got more than 200 shrubs already! There are two ways to reduce the number of shrubs: decreasing the coverage, or increasing the instance radius. Halving the coverage to 0.25 (25%) will halve the number of shrubs. Doubling the instance radius to 64 will reduce the number of shrubs by a factor of 4, and will also put more distance between shrubs, so let's try that first:
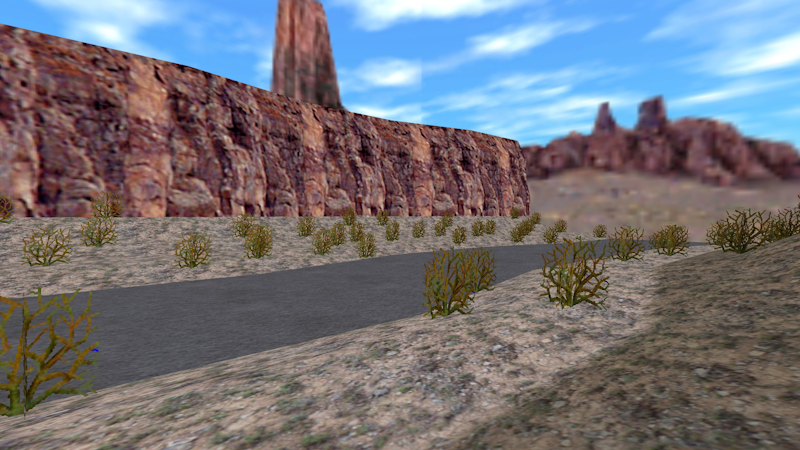
That's better - now we've got something that looks like a desert instead of a jungle.
2. Adding variety
Increasing the radius helped, but the scene is still a bit dull - it's lacking variety. Let's make it more interesting by adding some rocks and cactuses.
First, create two copies of our 'prop_desert' macro_template. Then create a rock func_wall inside one of them and a cactus func_wall inside the other:
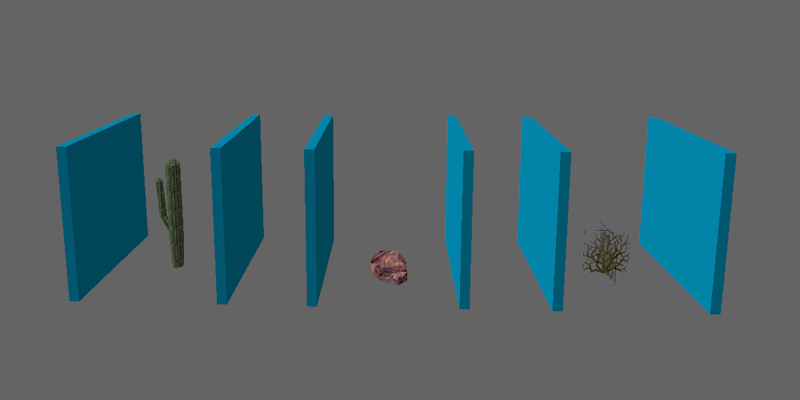
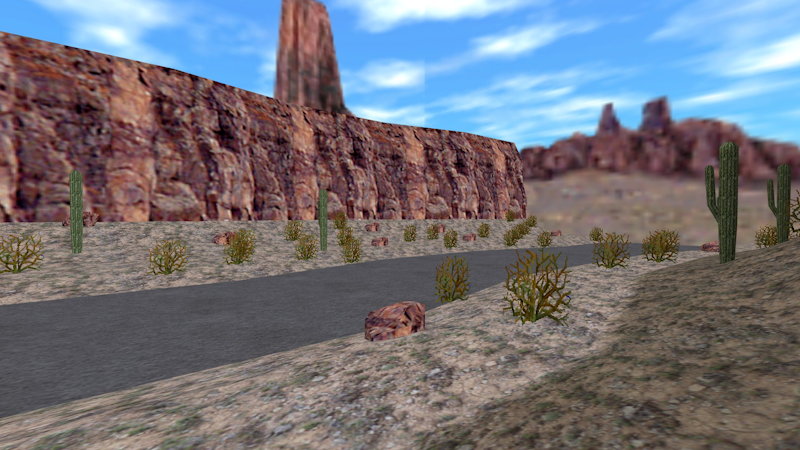
Whenever MESS finds multiple templates with the same name, it will randomly select one of them each time it creates an instance. So when we recompile the map, we'll see that some shrubs have been replaced by cactuses and rocks:
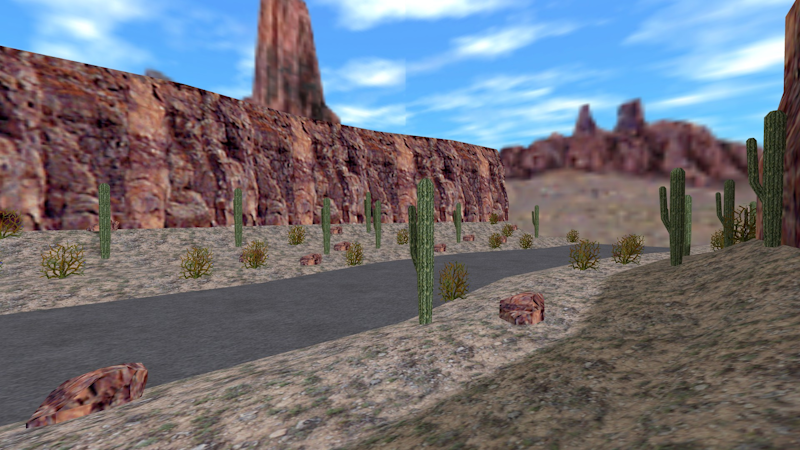
Right now, 1/3 of all instances are shrubs, 1/3 are rocks and 1/3 are cactuses. What if we want more shrubs? We can do that by adjusting the selection weight of the templates. Try setting the selection weight of the shrub template to 3. That changes the total weight to 5 (1 + 1 + 3), so the shrub template now has a 3/5 chance of being chosen, and the other templates each have a 1/5 chance:
3. Randomizing scale and angles
If we take a closer look, we'll see that all the shrubs, rocks and cactuses have the same size and face the same direction. They're all perfect clones of each other, which isn't very natural. We can improve that by randomizing their scale and direction. Select the macro_cover terrain and change the following properties:
| property name | value |
|---|---|
| Instance angles (Pitch Yaw Roll) | 0 {rand(0, 360)} 0 |
| Instance scale | {rand(0.5, 1.25)} |
The curly braces contain scripts - in this case we're using randomness functions to give each instance a scale between 0.5 and 1.25, and a yaw between 0 and 360 degrees.
Don't worry if you're not a programmer! A lot of things can be achieved with little or no scripting at all, and whenever scripting is required, often a small script like {rand(0, 360)} is sufficient. You can get pretty far by just copy-pasting the scripts you find in these tutorials and playing around with the numbers.
After recompiling, this is what we get:
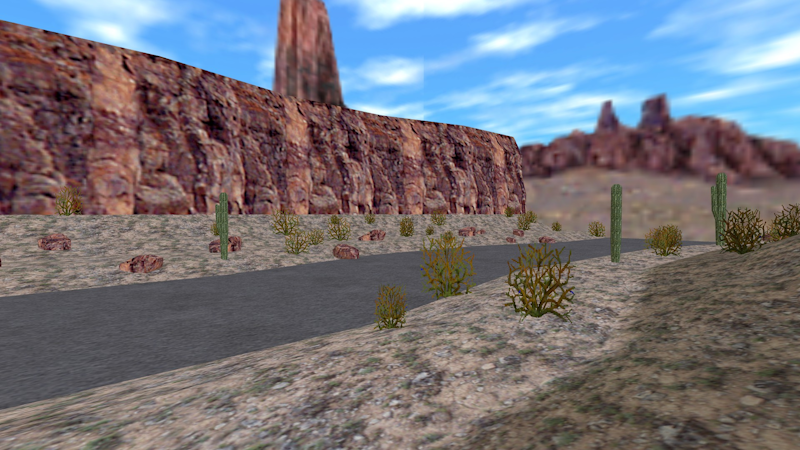
However, if you look carefully, you may notice a small problem:
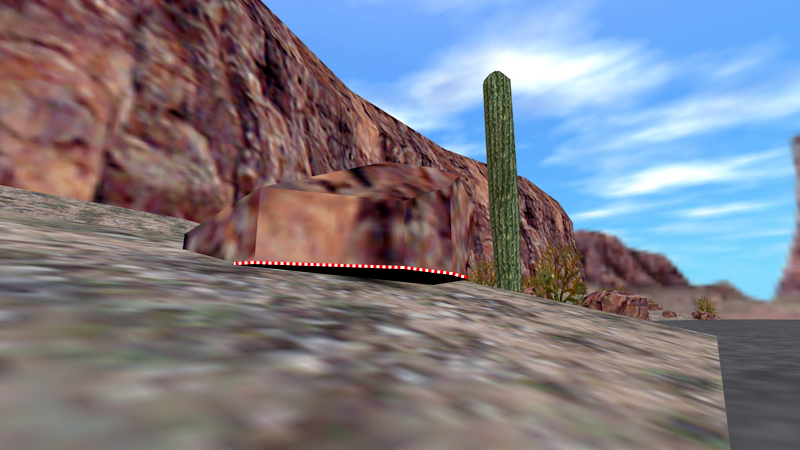
Whenever a rock or cactus is placed on a slope, a small gap appears between their bottom and the terrain. To solve that, we need to extend the bottom of the rock and the cactus a bit. However, objects that extend beyond the bounding box of a macro_template are no longer part of that template - they have to be fully inside.
We can fix that by switching the 'Anchor point' of these templates to 'Center':
| property name | value |
|---|---|
| Anchor point (origin) | Center |
Because these templates now have a different origin, we also need to move the rock and the cactus to the center of their templates, otherwise they'll end up inside the ground. For the cactus, that means we'll need to resize the template to make things fit:
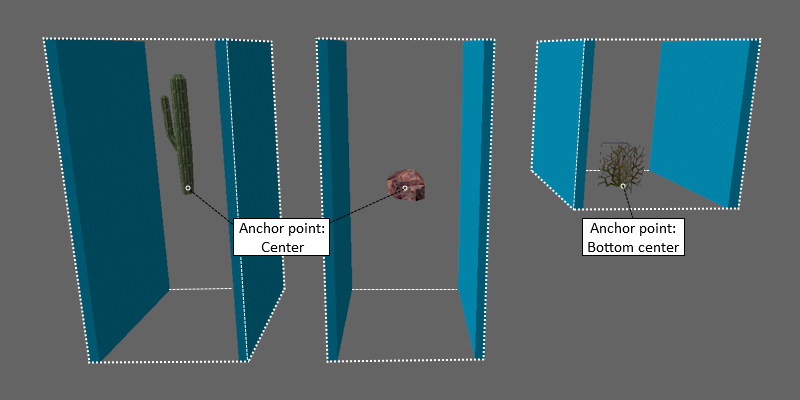
Here, the rock template has also been resized so all the props remain neatly aligned, but the rock could have been moved upwards just as well. We can now recompile, and the gaps will be gone - if the props have been sufficiently extended, of course.